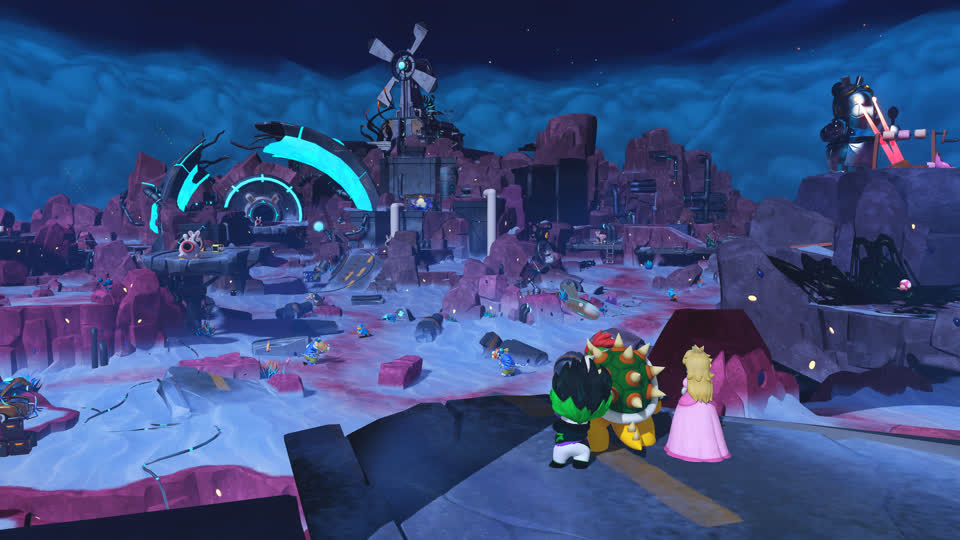
Welcome to the tutorials for Barrendale Mesa. These instructions will give you advice on how to win the main battles and find your way, allowing you to progress in the game. If you have already figured things out, these tutorials might help you find new ways to use your Heroes and Sparks!
Of course, with the right strategy, any team would be able to complete battles, but certain combinations could give you an upper hand over enemies.
Please avoid reading any further if you would prefer to figure things out on your own.
The first thing you need to do on Barrendale Mesa is to clear the Darkmess puddle blocking the path toward the Windmill.
THE DESERT RIPTIDES
![[MRSH] Barrendale Mesa Tutorial - The Desert Riptides](http://staticctf.ubisoft.com/J3yJr34U2pZ2Ieem48Dwy9uqj5PNUQTn/5p9h1AGl4lsOyjwCuWg1sJ/c64a21a578514b2c59529101dddea3f6/The_Desert_Riptides.jpg)
The Riptides on this map will pursue your heroes if they get hit. They have splash-based attacks. They are weak to shock and resistant to splash. Our strategy will be to control them.
Recommended team setup: Edge (Electrodash, Pyrostar) Rabbid Rosalina (Glitter, Starburst) Rabbid Mario (Electroid, Cryobolide)
- Rabbid Rosalina has Ennui dash and all points in her Technique Skill Tree
- Rabbid Mario has all points in his Weapon Skill Tree. He does NOT have AOE dash.
- Edge has all her dashes unlocked and Critical Dash
With Glitter at level 5, Rabbid Rosalina can pull in at least three Riptides in close, allowing her to put four of them to sleep with Ennui. But wait a little bit with that Ennui and let Edge and Rabbid Mario use the grouped-up enemies to their advantage first.
If you use Electrodash with Edge you can severely damage grouped-up Riptides without activating their pursuit and retaliation attacks. If you instead choose to use Pyrostar with Edge, she will be able to deal with Scopers easily.
If Rabbid Mario activates Cryobolide before attacking, he can avoid retaliation as the Riptides will be stuck in place. If he activates Electroid before attacking, he will do massive damage to any Riptides in his range.
Rabbid Rosalina can use Ennui and Ennui Dash to control any remaining awake enemies and Starburst to boost her friends.
Once the battle is over, you can now cross the map and enter the Windmill site.
DANGER KEEP OUT
![[MRSH] Barrendale Mesa Tutorial - Danger Keep Out](http://staticctf.ubisoft.com/J3yJr34U2pZ2Ieem48Dwy9uqj5PNUQTn/73YIIydSBM9k9CuuyamlbR/a85706ceb5c6ace883fad31e7f226b1a/Danger_Keep_Out.jpg)
On this map, you're introduced to a new enemy: the Spellraisers. They will try to keep their range from your heroes while summoning in Stooges and they have a very long attack range, so keep your Heroes protected! They are weak to Gust damage and resistant to Ooze.
Recommended team setup: Luigi (Zephystar, Ethering) Mario (Pyrostar, Electroid), Peach (Exosphere, Pyrogeddon)
- Luigi has all points in his Technique Skill Tree and the rest in his Weapon Skill Tree
- Mario has all points in his Technique Skill Tree, Jump Shot, and Second Helping
- Peach has all points in her Technique Skill Tree and the rest in her Movement Skill Tree
Tactical advice: Luigi and his Ghost Bullet and Steely Stare is an expert at dealing with enemies trying to move. If Luigi activates Zephystar, he can destroy a Spellraiser in one turn.
Mario is very adept at dealing with summoned stooges with his Hero Sight and Second Helping. Get him to the other end of the battlefield to fight from there.
Peach will protect your team from damage with help from Exosphere and her Team Barrier technique. She can use the Rabbid Pipes and Pyrogeddon or dashes to get specific enemies to move.
Next up, you'll need to connect a circuit to continue. Use the correct pipe parts and align them by turning the respective control panels until they face the right way to let the electricity pass through.
Once the crane operating panel is activated, turn the crane to the rightmost position where it places a crate for you to walk over into the next area. In this area, you'll find another circuit to complete. Think about which panels you want to activate, looking at where the wires lead. If you've unblocked a pipe to make a bridge redundant, you can use those pipe parts for something else!
Once you've unblocked the Rabbid pipe by Prof. Backpack, it's time to turn the big crane again, this time into the central position.
MAGIKOOPA MAYHEM
![[MRSH] Barrendale Mesa Tutorial - Magikoopa Mayhem](http://staticctf.ubisoft.com/J3yJr34U2pZ2Ieem48Dwy9uqj5PNUQTn/zG9bJgwzP4ejbXN6mOd34/ef228fedd40be779d6098d644a226204/Magikoopa_Mayhem.jpg)
On this map you have a special objective: Survive! You'll need to keep at least one of your Heroes undefeated for six turns. You will face a new type of enemy: the Magikoopa. These dangerous enemies are resistant to all types of Super Effects. They do an area-of-effect attack and boost the attacks of their allies. We will strive to control the battlefield.
Recommended team setup: Rabbid Mario (Optional, Electroid) Rabbid Rosalina (Glitter, Optional) Luigi (Starburst, optional)
- Luigi has his full Technique Skill Tree
- Rabbid Rosalina has her full Technique Skill Tree
- Rabbid Mario has his full Weapon Skill Tree
Tactical advice: Rabbid Rosalina can do a team jump into the middle of the battlefield, next to the electric barrel, where a lvl 5 Glitter can attract all Magikoopas and almost all Sea Stooges to her location. Luigi can use Starburst to boost the team, and Rabbid Mario can then easily dash and attack until these initial enemies are defeated.
The next wave of enemies will spawn through portals. Once you see the portals, move your team far away from them onto an opposing platform, as the enemies will attack directly upon exiting and the portals can't be destroyed.
When a new wave of enemies has spawned, draw them in with Glitter again and get rid of them as soon as possible. If Glitter is on cooldown, buy yourself some time with Ennui.
If you're running out of movement space and enemies are about to spawn close to your Heroes, remember to use a Movement Boost. If you really want to use Glitter or Ennui, you can also use a Cooldown Clock.
There will be more circuit puzzles to complete next as you continue to explore Barrendale Mesa. Remember that you can always recycle pipe parts by picking them back up from where you placed them before and putting them where you need them now instead. Pipe parts can also be moved by putting them on top of movable structures, just like crates or rocks.
Get to the top of the crane and unfurl the ladder. Use the crane for the final time and put it in the last and leftmost position. Use the ladder and run toward the Darkmess-infested Windmill.
A FOUL WINDMILL BLOWS
![[MRSH] Barrendale Mesa Tutorial - A Foul Windmill Blows](http://staticctf.ubisoft.com/J3yJr34U2pZ2Ieem48Dwy9uqj5PNUQTn/3c9Xy5IZCaoC2GATVccbXx/1ae1a5b183d120c870985551e4b887cf/A_Foul_Windmill_Blows.jpg)
The goal in this battle is to protect the Windmill as waves of enemies try to destroy it. You can activate traps to help you with this.
- The yellow platform spawns Riptides and Sea Stooges
- The orange platform spawns Magnafowls and Sea Stooges
- The blue platform spawns Spellraisers and their stooges
- The purple platform spawns Sea Stooges
The central platforms give you a lot of movement options. Jumping down from the ridges grants you enough movement range to get to the trampolines on each platform and jumping up from these trampolines lets you access ridges leading onto other platforms.
Recommended Team setup: Mario (Cryobolide, Toxicomet) Luigi (Electroid, Zephystar), Rabbid Luigi (Glitter, Aquanox)
- Mario has his full Weapon Skill Tree, the rest in his Technique Skill Tree
- Rabbid Luigi has his full Weapon Skill Tree
- Luigi has his full Technique Skill Tree
Tactical advice: Luigi and Mario are great at protecting the Windmill and staying on top of the elevated platform, taking out enemies at a distance, and using Steely Stare or Hero Sight to stop anything trying to approach. Remember to activate Steely Stare and Hero Sight as the first thing you do.
Rabbid Luigi can use Glitter to attract the Magnafowls on the red platform, setting off Luigi's Steely Stares and Mario's Hero Sight.
Luigi can shoot the faraway orb-like traps directly from the central platform. This sets off the electric trap that does a lot of damage to any Riptides or Sea Stooges standing in its range.
Rabbid Luigi can use the trampolines to get close enough to shoot at the traps, causing a lot of damage to Riptides and Sea Stooges while also activating the barrels on the platform.
Mario can use Toxicomet to do great damage to Magnafowls. Luigi can use Zephystar to do great damage to Spellraisers. Rabbid Luigi can use Aquanox to bounce enemies out of bounds or cause them to move to trigger the reaction techniques from Mario or Luigi.
In the next stage of your journey, you need to get back to Momma's Garage. You can fast-travel to the WM ARC Spaceship, or you can run there.
THE HUNTER OF THE MESA
![[MRSH] Barrendale Mesa Tutorial - The Hunter of the Mesa](http://staticctf.ubisoft.com/J3yJr34U2pZ2Ieem48Dwy9uqj5PNUQTn/6PwSS7ycP6BjpymH8QoFCK/3d57cd653350ba0a503901a039cc7ed0/The_Hunter_of_the_Mesa.jpg)
This is a battle in three phases where you face off against Daphne, the Spark Hunter on Barrendale Mesa. She is resistant to Ooze and will be fully covered even if she's just behind a half-cover. She fires two long-distance attacks and will use an Ooze technique if your heroes get close. Remember to level up your Sparks, you need them to be powerful!
Recommended team setup: Rabbid Mario (Cryobolide, Glitter) Mario (Electroid, Starburst) Peach (Aquanox, Exosphere)
- Mario has full points in his Technique Skill Tree, the rest in his Weapon Skill Tree
- Peach has most of her points in her Technique Skill Tree, and Barrier Jump Assist
- Rabbid Mario has full points in his Weapon Skill Tree
Phase One:
Use the Rabbid pipe on the right and go to cover while dispatching the Sea Stooges with Mario and Electroid. Make sure to be protected from Daphne as she will target two Heroes at the same time.
On the second turn, use Glitter with Rabbid Mario to attract Daphne and the remaining enemies and focus your firepower on her to finish the phase.
Phase Two:
Go to your right when starting the battle and use the trampoline to move your heroes at cover from Daphne but closer to her.
On the second turn, use Peach's Team Barrier Technique to pass through the Lone Wolf Evil Sight unharmed and then attract Daphne with Glitter. You should be able to finish her this turn.
Phase Three:
Move your heroes on the right, pick up a Bob-omb on the way and throw it on the Magnafowl. Move your heroes carefully and keep them close to each other while finishing the Magnafowl. Finish your turn in full cover from Daphne.
Climb the mountain slowly and try to always remain hidden behind cover from Daphne. If a Hero is unprotected, use Peach's Barrier to protect him or use a Move Boost item to be better placed. Use Peach's Aquanox to push the other Magnafowls away if they get too close.
Glitter won't bring Daphne to you this time, so you'll have to flank her. Position your Heroes behind her by using the trampolines and bring Rabbid Mario close to her. His powerful attacks and double dashes combined with Mario's Hero Sight ability should be sufficient to finish her in just one turn, so you can just ignore the Medicians.
SUMMARY AND CLOSING
We hope this advice has served you well! Use what you learned from these battles for any other challenges coming your way. Don’t forget to do the Spark quests on Barrendale Mesa before advancing to Cursa’s Stronghold, the rescued Sparks will prove useful in future battles!
Stay in touch! You can always find us on @mariorabbids.


